By: Mark Abrams
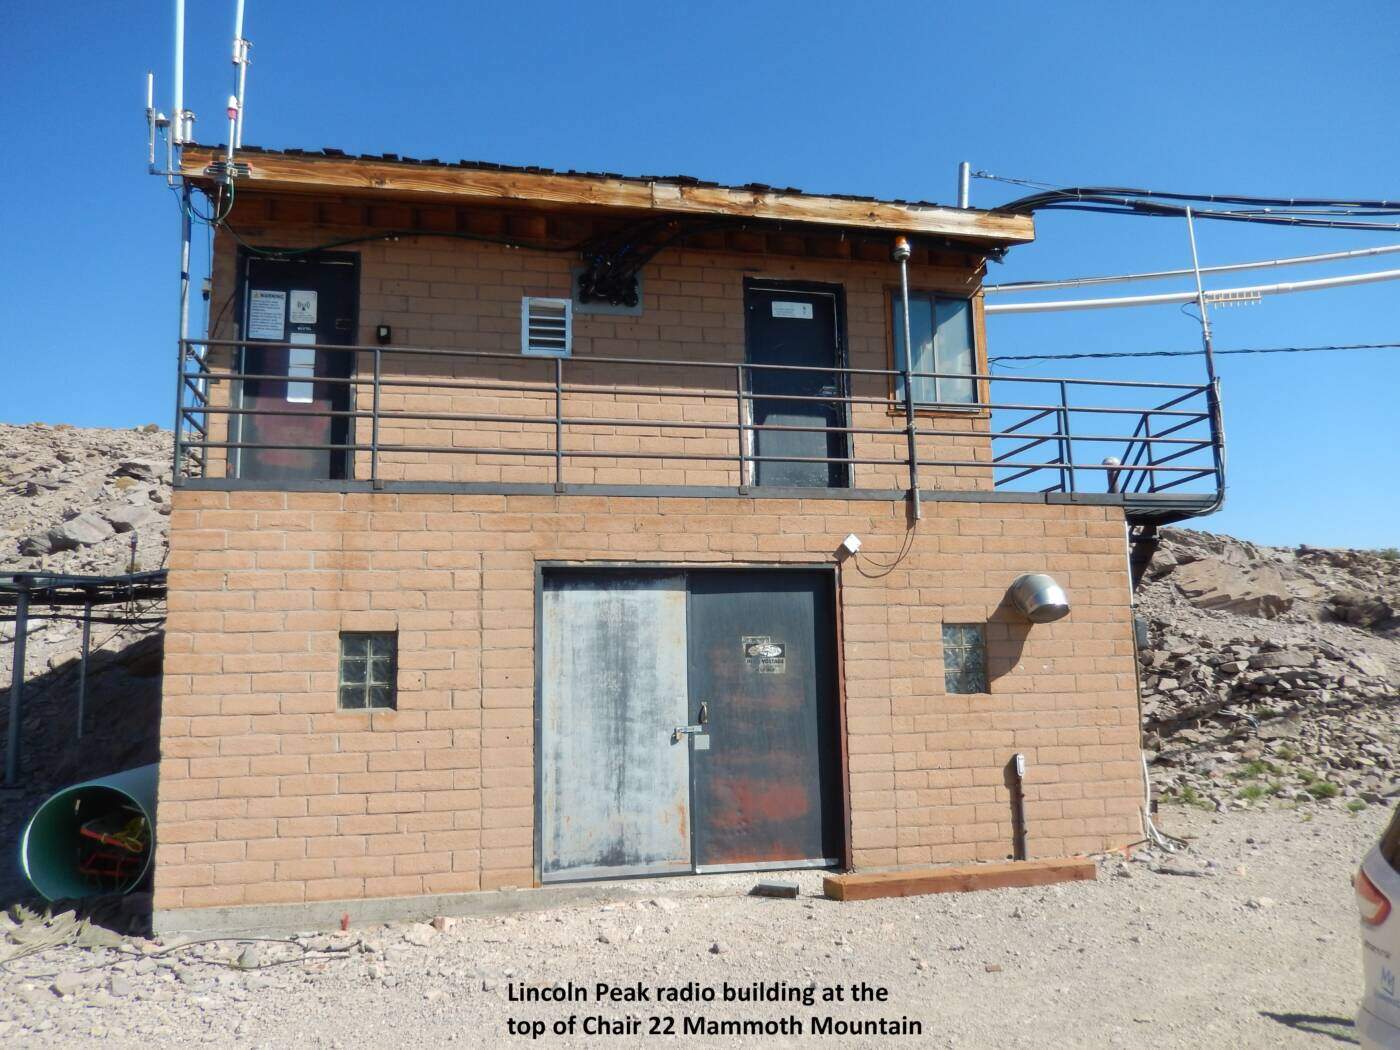
It was the last weekend in October set to arrive when we headed up to Mammoth Mountain on October 26th to install a radio system at the Lincoln Peak site, one of the lower peaks at Mammoth that provides great coverage of the Mammoth area along with coverage of the Lake Mary area and the back country of the Mammoth Lakes area. Other coverage includes Crowley Lake, Crowley, Mono Lake, Benton Crossing, Toms Place and Hwy 167.
We had a two day job to do in Mammoth which is a 6 hour drive so we headed up there on Wednesday afternoon to stay over night to make it easy to get an early start on Thursday, the next morning installing our equipment at the site. I drove the usual route after meeting Chris at the shop so that he could ride up there with me in the same vehicle. Nick took his van to David’s house and rode up with David in his truck taking the disassembled rack along with most of the other material that we needed for installing the system. The ski area requires that all vehicles that drive up the mountain be 4WD, so we were not allowed to take Nick’s van to the site. David drove his vehicle with Nick heading north via Interstate 15 merging over to US395 while driving through Kramer Junction, Randsburg, Johannesburg, Ridgecrest, Coso Junction, Lone Pine, Independence, Big Pine and Bishop on the way to Mammoth. As Chris and I headed north, we passed through the San Fernando Valley while merging onto Hwy 14 and passing through Canyon Country, Palmdale, Lancaster, Mojave, Jawbone Canyon, Red Rock Canyon, Roberts Roost and eventually to Indian Wells where we joined US395 to travel through the same towns that David traversed during his trek. Eventually, we all met in Mammoth where we checked into the house, rested up and proceeded to get dinner. After dinner, we retired to the house and went to bed early so that we could get an early start in the morning.
We were up at 6AM the next morning so that we could get some breakfast prior to meeting with Mammoth Mountain security. We needed to contact them between 7:30-7:45AM so that we could get the key and to be escorted to the site. The security department wanted to tell us the route to take up the mountain, but we wanted an escort due to being unsure of the correct route to take to the site. Also, once we got there, we wanted them to tell us the correct location for our equipment so that we did not get a call from them complaining that we installed the equipment in the incorrect location. After insisting that we be taken up the mountain, we drove up to the site. Being an avid skier at Mammoth Mountain, I was accustomed to the look of the mountain with snow on it. It looked very different without any snow which made it difficult for me to navigate the roads.
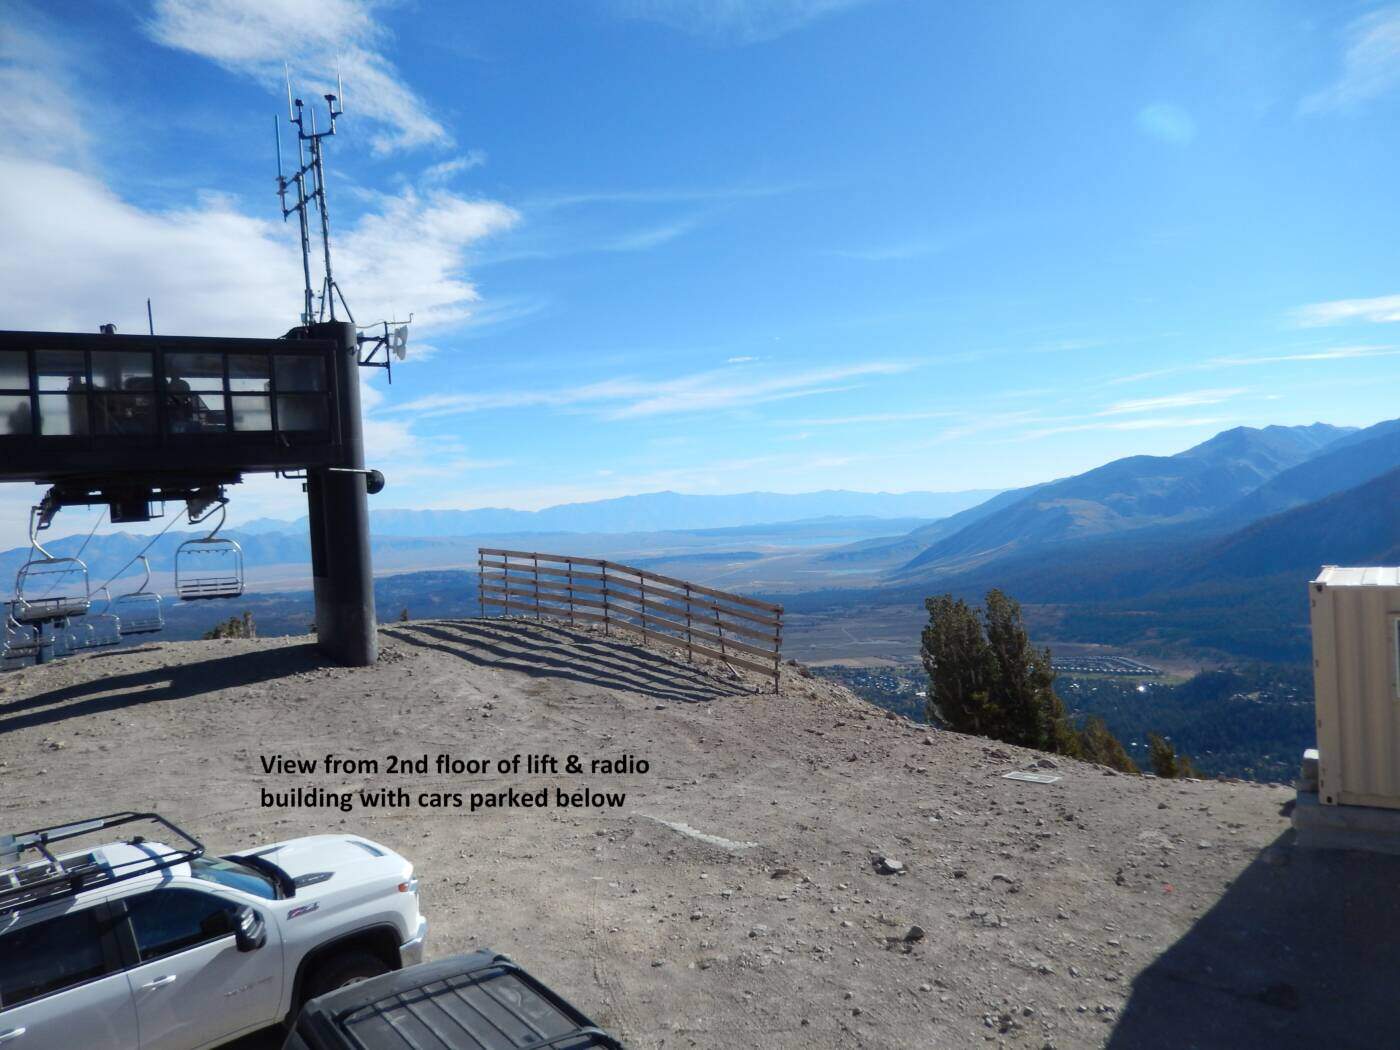
We arrived at the site with little fanfare and proceeded to park our two vehicles in a position to make it as easy as possible to unload our tools and equipment. The room in which we were supposed to install the equipment was on the 2nd floor of the building which housed the electrical equipment for the chair lift, the lift operator controls, a ski patrol office and the radio equipment rooms where T-Mobile, AT&T and Mammoth Mountain had their equipment located. MRA was to install its equipment in the same room as Mammoth Mountain and the AT&T cellular equipment.
We proceeded to unload the equipment so that we could begin working the chain gang to move the equipment upstairs. The equipment was bulky and heavy which made taking it up the stairs exhausting, especially considering the fact that we were at over 10,000 feet where the air is quite thin. This makes everything that we do take considerably more effort than if we were at sea level or even at a high mountain in the Los Angeles area where most of the radio tower site at 6,000 feet or less. So piece by piece, we managed to get the equipment upstairs into the radio room where we found a lot of nooks and crannies to place the equipment out of our way until we needed it. With the help of all 4 of our people, we managed to get the main equipment rack and all the associated equipment up the stairs and into the room where we set the rack down in the location where we thought it best. We started to assemble the rack when we called the man from security to verify that this was the correct location. Unfortunately, he had no information on the issue and refused to render an opinion leaving us in a quandary as to the correct place for our equipment installation. We then asked him to get Walt up to the site so that he could render the decision so that we could proceed with the installation. Eventually, Walt arrived at the site and proceeded to look things over and decide where we should place our equipment.
Mammoth Mountain is in a volcanically active area which includes a volcanic vent in the middle of the mountain called a fumeral. It constantly expels volcanic gasses which can be noxious and in sufficient concentration, can kill. The volcanic vent is a few hundred yards from McCoy station which is the location of the Gondola that is used for taking people and skiers up the mountain. McCoy station is on the mid mountain about ½ way from the bottom to the top so there is a lot of traffic in the area. The fumeral is in a more remote area off the chair #3 lift and the exhaust smells like rotten eggs much of the time due to the high sulfur content. Since the area has volcanic activity, it was imperative that we secure the equipment because ground tremors could knock over our equipment if it was not properly secured.
We found the exact location for the equipment placing the rack in the spot and marking the floor so that we could drill the concrete floor to anchor the rack in place. We moved the rack out of the way and proceeded to drill the floor. Each of the four rack anchors are approximately 3 inches tall, but each of the holes that we attempted to drill only went down about 2.75 inches. It seemed like I was hitting something very hard that prevented the roto-hammer from going any deeper. This was very odd because we were not expecting to hit any rebar embedded into the concrete in every hole. Occasionally, we will hit rebar in one hole, but never all 4 holes. So we went downstairs to look at the ceiling to see what might be impeding our progress drilling the holes for securing the racks. When we looked up, it became obvious what was impeding the holes that we were drilling. There was a large steel I-beam that was holding up the ceiling of the first floor supplying structural integrity to the area directly under the floor area that we were drilling. The steel I-beam was a minimum of ¼” thick and may have been as much as 3/8” thick by 2’ wide which provided a significant impediment to drilling any further. Now we had to figure out how to complete the securing of the rack without being able to drill deep enough for the concrete anchors to secure the rack properly. Without the holes being sufficiently deep, the anchors protruded above the surface of the concrete which prevented us from properly securing the rack to the ground. We looked at the anchors and figured out that if we were careful, we could shorten the anchors to fit in the holes that we were able to drill, however, the portion that we had to cut off included a “clip” that held that anchor together. Therefore, when we trimmed the anchor, we removed the clip that held the anchor together. This meant that we had to come up with another method of keeping the anchor together which we did with a small amount of electrical tape, but that meant that we had to be very careful with the installation of the anchors into the concrete to keep them from disintegrating while hammering them into the holes. Eventually, we got all the anchors installed and managed to secure the rack onto the floor.
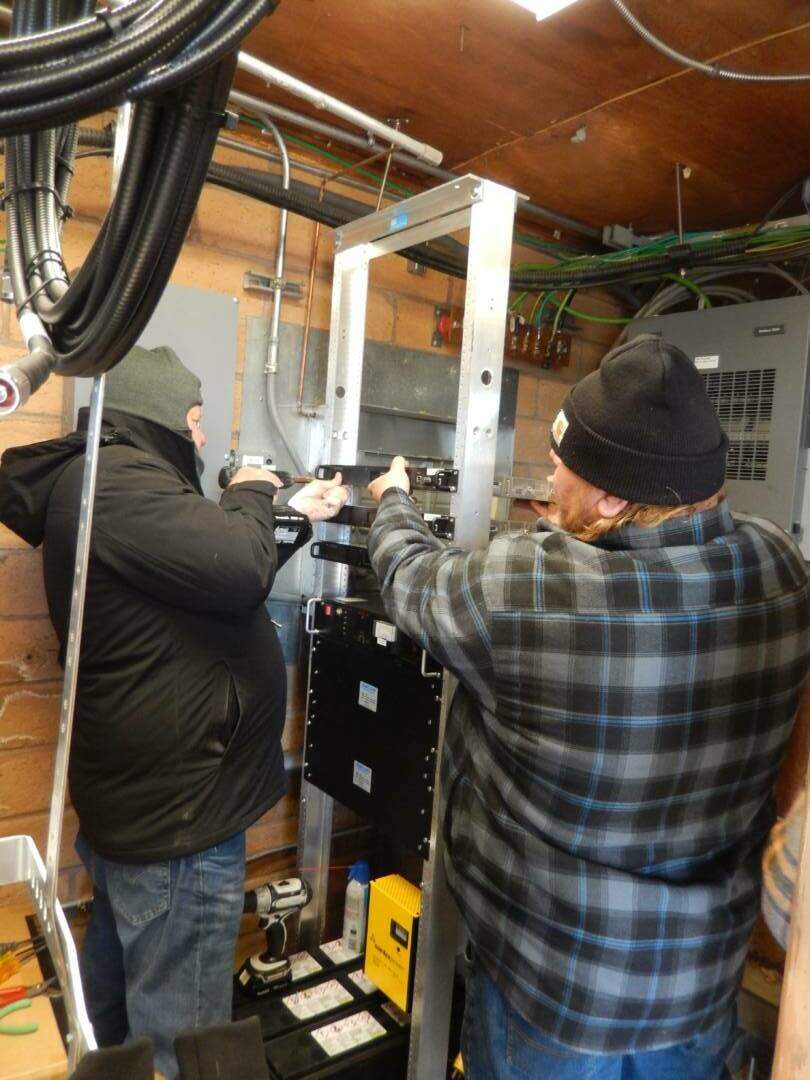
Now that the rack was secured, it was time to install the battery tray and the batteries. The battery tray is designed to handle 350 pounds of battery so it is made of heavy gauge steel. The mounting ears have to be assembled onto the tray and then the tray needed to be mounted at the bottom of the rack, thus keeping the heavy weight close to the floor which gives the installation more stability. After securing the front set of brackets, it was time to install the brackets on the back of the battery tray which meant that the battery tray is secured to the rack both front and back for extra strength and stability. Now that the tray was in place, it was time to install the batteries on the tray and wire up the batteries with the #4 cables that hook all the batteries together. The batteries then needed to be attached to the power supply battery inputs through the circuit breaker and have the battery charger installed.
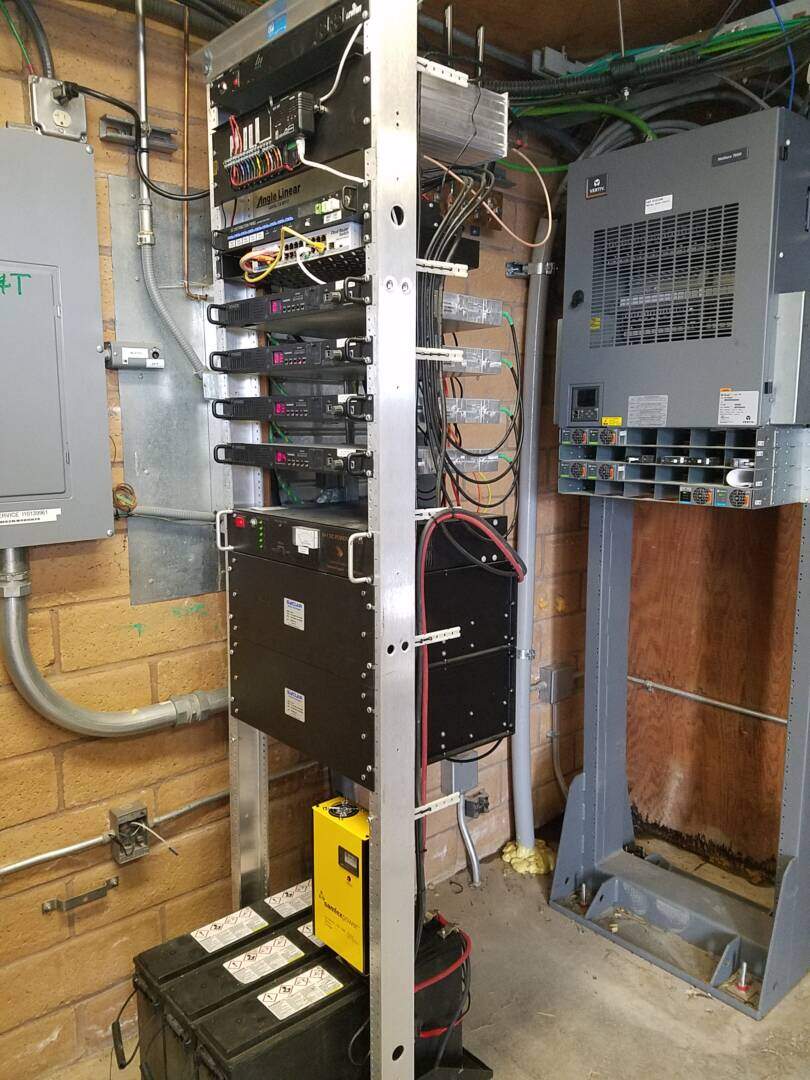
Now that the batteries were in place, we started mounting the equipment into the rack. We pulled out a picture of the system as it was assembled in our office where we had it fully assembled and operational. We proceeded to mount each piece of equipment in the rack one at a time, working our way upward from the bottom starting with the transmit combiner, then the power supply, the repeaters, the router, the power distribution, the receiver distribution panel and the receiver filter with the site monitor mounted to the back side of the filter. Finally, we mounted the power outlet strip at the top of the rack. After attempting to hook everything up, we found out that if we adjusted the spacing of a few pieces of equipment, the cabling worked better, so that took some extra time.

Another issue was where we were supposed to get the power to run our equipment. There were two power panels in the room and there were no convenience outlets for us to plug into for our equipment or for any test equipment. One power panel was marked for AT&T and seemed to power just the AT&T equipment. It was decided that we probably should power our equipment from the other power panel which was powering the Mammoth Mountain equipment along with the lights, air conditioning and other items in the room. Unfortunately, that power panel was considerably further away and there was no clear path for running EMT conduit. We had to figure out how to get a clear circuit breaker for the panel as well as how to run the conduit and where to place the outlet. I worked on that portion of the installation issue making mental notes as to how to get the job done and what materials we would need to obtain since we had not brought any electrical supplies with us. It was about 10 minutes to get down the mountain and another 10 minutes into town where there was a DIY Center that carried electrical supplies. Therefore, I left the work site to head down the mountain to collect the needed electrical supplies while the others stayed there to complete the last of the equipment installation and complete as much of the tower work as possible.
When I got to the bottom of the mountain, I started heading back to the town. When I was ½ way back to the town, I received a phone call from the DWP regarding an apartment building that I owned. They were telling me that they had an order to turn off the power to the building and that if I wanted to stop the power shut-off, I needed to handle the payment that had not been made. This threw me into a tailspin in an attempt to stop the power shutoff to the building. Eventually, it was determined that the call was a scam and that the DWP was not threatening to turn off the power to the building. As a result, I did not get to the DIY center until just after 5PM to find out that they were closed at 5PM due to being on shortened summer hours because the town was very empty at that time of year. This meant that I had to go to the DIY Center in the morning to pick up the electrical supplies to install the electrical power to run our equipment at the site.
While all this was going on, the Nick, Chris and David were working on the tower mounting the antennas up at the top and securing the cables down the tower. All cables needed to be secured with stainless steel tower clamps and the cables needed to be grounded at the top of the tower per the R56 grounding standards. This was a long slow process which takes many steps starting with the mounting of the clamps on the tower, raising the antenna mast up the tower and mounting them in the clamps, mounting the antenna to the top of the mast, securing the receive antenna cable to the upper antenna, raising the mast to its resting point, securing the mast, mounting the transmit antenna and attaching the transmit antenna cable to the transmit antenna. Now it was time to install the ground kits at the top of the tower to ground the cables per the R56 standard that was dictated to us. Then it was time to start securing the cable down the tower as Chris was finished at the top of the tower. So Chris started climbing down the tower slowly working on the tower clamps every 3 feet while working his way down the tower. By the time that Chris got to the bottom of the tower, the sun was getting low in the sky so it was time to clean up the tools and put things away for the night. The temperature would drop 10-20 degrees in a short period of time once the sun dropped below the local ridge that blocked direct sunlight and once it got dark, it would quickly drop even further. It was time for the guys to leave the site and head down to the house so that we could relax and get ready for completing the job the next day.
It was about 7PM when we decided to head out to dinner. We went over to Giovanni’s Restaurant & Bar where we were able to feast on a variety of different entrees. I ordered the garlic cheese bread for the table because I thought that the table might be hungry. Instead, the people at the table were hungry and wolfed down the appetizer while waiting for the main entrees to be delivered to the table. The food was served promptly and freshly from the oven making dinner a delightful experience. After dinner, we retired to the house where we went to our respective rooms to retire for the evening since we needed to get up early the next morning.
6:00AM arrived early on Friday morning and it was time to get ready for the day’s work. We went to breakfast by 7AM since we had planned to get done by about noontime to 1PM so that we could drive back to Los Angeles the same day. After breakfast, the guys headed up to the mountain while I went to the DIY Center to pick up the electrical supplies to complete the power wiring to power our new equipment. I went inside to the electrical section to find out that there was a significant lack of the items that I needed. I had to keep changing my mind as to what materials I needed for the job. When I could not find the correct outlets, I needed to find alternative outlets, but they still needed to be 20A outlets. The standard wall outlet is a 15A outlet and does not accept the 20A plug that is on the outlet strip that we had for the equipment rack. I went back and forth several times looking at what was available and had to put some materials back because the other items that I needed to go with that item were not available. Eventually, I managed to find a combination of materials that they did have that would accomplish the task. Some of these materials had to be cut so once I had them cut the materials, they were not returnable. Eventually, I had everything that I needed to make the electrical installation work so I headed to the cash register to get checked out so that I could head to the mountain and meet the guys up at the site.
While I was at breakfast, I received a phone call from Walt who had gone to Lincoln Peak to see how we were progressing on the job. He found that we had left the cover panels off of the two power panels the night before and proceeded to rip me a new hind end. I explained that I had left the site early to purchase the electrical supplies and had intended to return the same day, but things had gotten out of hand with the scammer who had tied me up for enough time that I was unable to get back to the mountain the same day. He let me know that we are to NEVER leave the site with the power panel cover removed as it is a safety hazard. I was very apologetic and humble about what we had done and promised that it would never happen again. So when the guys got to the site before me, they closed up both power panels to make Walt happy which meant that I had to open the power panels again once I got up to the site.
It was now about a 10 minute drive to the mountain and another 10 minutes up the road to Lincoln Peak. I followed the same route that we had taken the day before and I made it to the site with the electrical materials. I hauled the supplies upstairs and proceeded to install the power connection. There were several challenges to getting the power installed which included locating a knockout for the plastic flex that was workable for our installation, locating a place for the breaker, locating an unused breaker for our use, routing the flex, locating and installing the outlet 4S box, wiring the outlets, pulling the wires and hooking up all the connections. Once all this was done, I asked David for his outlet tester so that I could verify the proper operation of the outlet. However, his tester indicated that I had an open ground. So now I proceeded to find out why there was an open ground. I spend at least 90 minutes securing grounds, installing additional ground wires, opening power panels, opening junction boxes and doing everything I could to determine what was wrong with the grounds. Everything I did seemed like it should have fixed the problem, but the outlet tester still indicated that I had an open ground on the outlet. I tried the outlet tester on other outlets in the room and it indicated that all of the outlets had an open ground. Now it was time to get my outlet tester to see if it gave the same reading as the one that I had borrowed from David. I went downstairs and grabbed my outlet tester from my toolbox. I then walked back up the stairs and went back into the radio room. I plugged the outlet tester into the new power outlet which indicated that the outlet ground was OK. I then tried it on the other outlets in the room and it indicated that the ground was just fine on all the other outlets that tested as being bad with the other tester. I then cursed out David’s outlet tester and returned it to him with a warning that it was a worthless piece of S$!&. I then proceeded to seal up all the power panels, outlets and boxes and test everything one last time before hooking our equipment to the power so that we could energize the equipment.
While I was working on the power, the guys were finishing up the cable installation. They had routed the cables under the ice shield and had secured the cables with the stainless steel cable clamps. They were then routed the cables up the back of the building inside the shield and into the one of the entrance ports where many other cables entered the building. The guys had installed the ground kit on the two cables outside the building per the R56 standard.
Now it was time to terminate the antenna cables inside the building. I needed two power tools including the band saw to cut the cable to the proper length and the portable drill with the cable prep tool. I also needed my knife to clean up anything missed by the prep tool and two crescent wrenches to tighten the connector. I figured out where I wanted to cut the cables so that the antenna cables terminated near our equipment rack which was just a few feet into the building. This goes against the strict interpretation of the R56 standards which require that the cable be terminated within 2 feet of entering the building. I have never been a big believer of the R56 standards as they would have cost us hundreds of thousands of dollars over the years to implement when in 40 years, we have suffered a grand total of 1 lightning strike that cost us about $2,000 to repair and we got it fixed within a day. The economics of adhering to the standards is not present in most locations in California until one enters a high lightning area. Also, some of the standards violate good engineering practices as told to me by the chief engineer of PolyPhaser, one of the largest and most respected companies in the lightning protection business. When we install equipment, I base my decisions on how to complete the installation on the recommendations of the PolyPhaser chief engineer and not the R56 standards. Now I used the cable prep tool with the portable drill and got the cable ready for the connector. I cleaned the end of the cables of debris and installed the connectors with dispatch.
Once the connectors were installed, I was able to attach the lightning arrestors to the end of the cable. However, I was in a dilemma because I needed the proper wire and terminals to attach the ground wires from the lightning arrestors to the ground bus. We had some materials with us, but not what we needed to make a good and secure connection. Therefore, we took a band aid approach to the problem to have something rather than nothing and attached the ground wire to the AT&T ground bus. We felt that this was better than nothing, not that it was correct.
It was time to check out the antennas to make certain that they were performing properly. I went down to the car and brought in my Anritsu antenna sweep generator which provides a more through test than just using a directional wattmeter. I swept both antennas and found that they both had return losses of greater than 20db meaning that at least 99% of the energy that is sent to the antennas is being radiated into the air instead of being reflected back to its source; the radio transmitters. This is a very good result that means that the site will perform well.
Now we are down to only one issue, the network connection. Mammoth Mountain had promised us an internet connection so that we could connect the site to the network. However, they told us upon arrival that they did not have the connection ready and it was not going to be ready for us before we were ready to leave. In fact, they did not know if they would ever be able to provide us the internet connection that we needed. Considering their vast network of internet nodes and WiFi access that they provide to the general public, it seems odd that they would have trouble providing the service. However, speculating as to the reason that we do not have the connection does not resolve the problem. We could get a connection from Schat.net, but we would need to spend the rest of the day getting the equipment and then it would be unlikely that we would finish the installation today. Also, we would need an ice shield to keep the ice from taking out our dish antenna which we did not have. Therefore, we elected to install a Verizon data modem on a temporary basis until next spring so that we could get the site on the air. David worked with Mark L. to get the data modem configured and connected to the network.
It was now about 1PM and it was time to pack up our tools, equipment, parts and supplies so that we can prepare to depart. Multiple trips from the radio room on the 2nd floor down to our vehicles were needed to get all the tools and materials back to our vehicles. Eventually, everything was stowed away in the vehicles and we locked up the building. We then proceeded down the hill and back onto the paved road. David and Nick started heading back to the house to grab their suitcases, then proceeded to head back to Los Angeles. Chris and I had to meet up with security to return the keys to the building before we could head back to the house to retrieve our belongings so that we could depart.
We headed back towards Los Angeles around 2PM which means that we will arrive around 8PM assuming that we do not stop for dinner. So we headed down main street until we reached US395 heading south towards Los Angeles. I set the cruise control to 70MPH while letting the vehicle almost drive itself. We continued south on the highway descending into Bishop where we had to slow down while traversing the town, then accelerating back to highway speed upon leaving Bishop. We continued heading south as we entered the town of Big Pine. The Copper Top BBQ was open, so we decided to stop in and have a sandwich before heading south again. We wolfed down a sumptuous sandwich and made our way back to the vehicle to resume our trek back to Los Angeles.
It was about 7:30PM when we hit the Los Angeles area by edging our way out of the mountains while heading south on Highway 14, than transitioning to Interstate 5, the Golden State Freeway. We continued down the freeway until the Burbank area where we experienced some slowing and again along the Griffith Park area. Continuing south, we reached the Long Beach Freeway turning south again towards the shop. We arrived at the office around 8:30PM and pulled into the parking lot. Chris then grabbed his belongings from the vehicle and loaded them into his car. We both departed the shop to head home. I arrived at home a bit after 9PM. It did not take long before I was in bed inspecting the inside of my eyelids.
Another job well done. . . . . . . .