By: Mark Abrams
It was an overcast and foggy day in mid May when we arrived at the job site to install a repeater system for use in a project to clean the gallery (an underground tunnel) below the spillway that connects Castaic Lake from the lower lake known as Castaic Lagoon. The spillway looks clean, but the gallery has numerous years of debris built up that collects through the normal use of the spillway.

Dam and Spillway
The gallery runs the length of the spillway from top to bottom. It is about 7 feet tall and about4 feet wide throughout most of its length, but it is considerably wider near the top. Water that seeps into the ground above the spillway and water that seeps through the concrete spillway is collected in the gallery and routed down to the lagoon below.
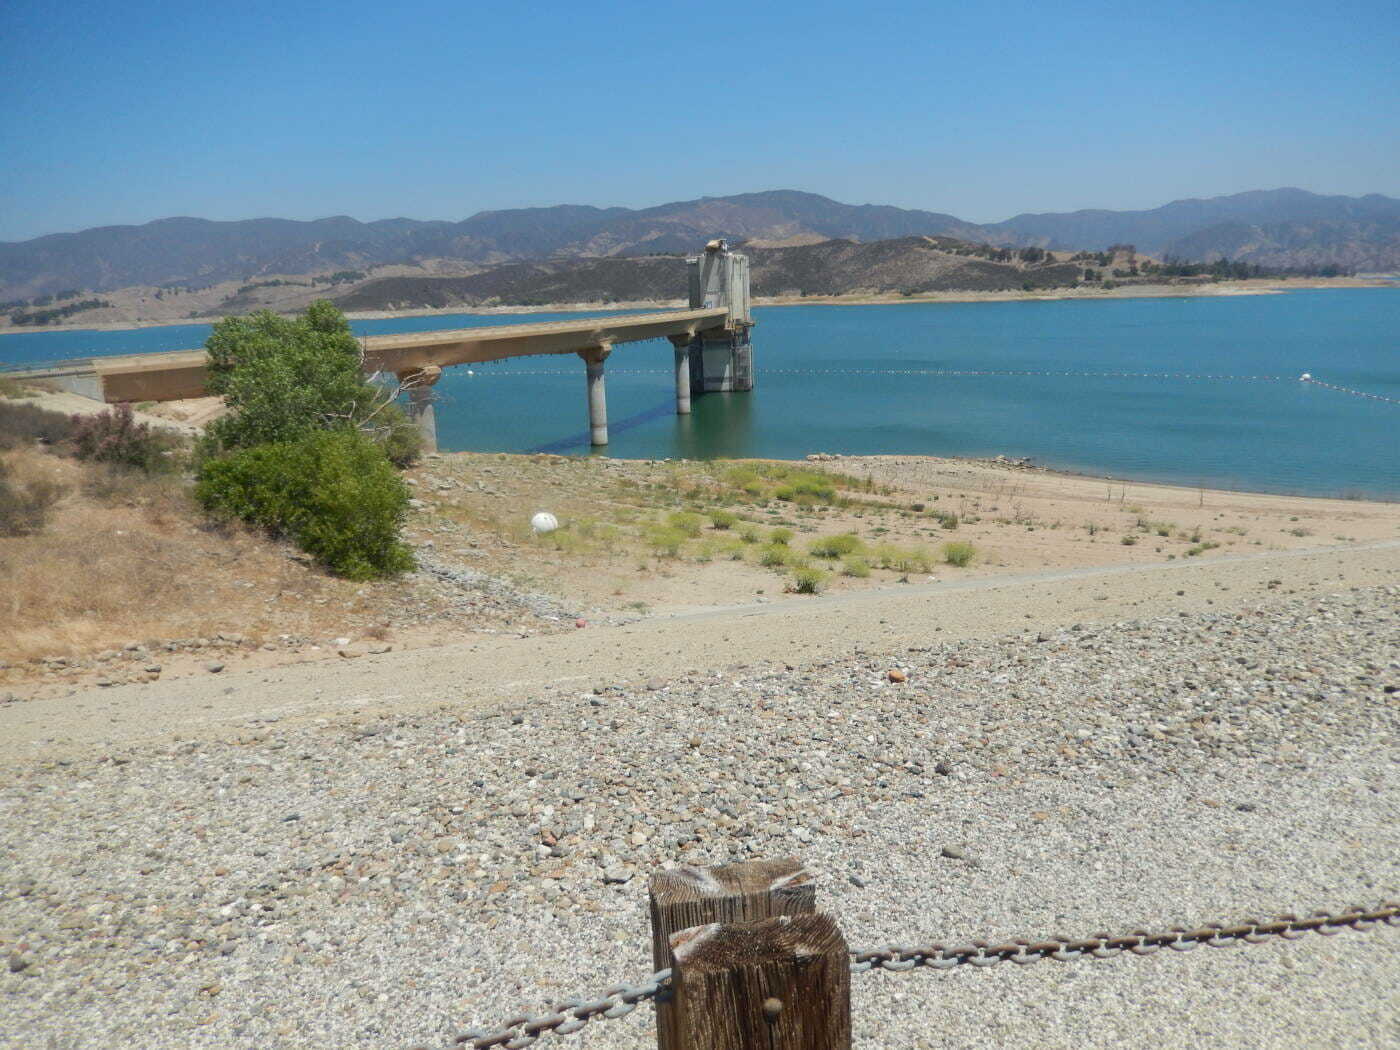
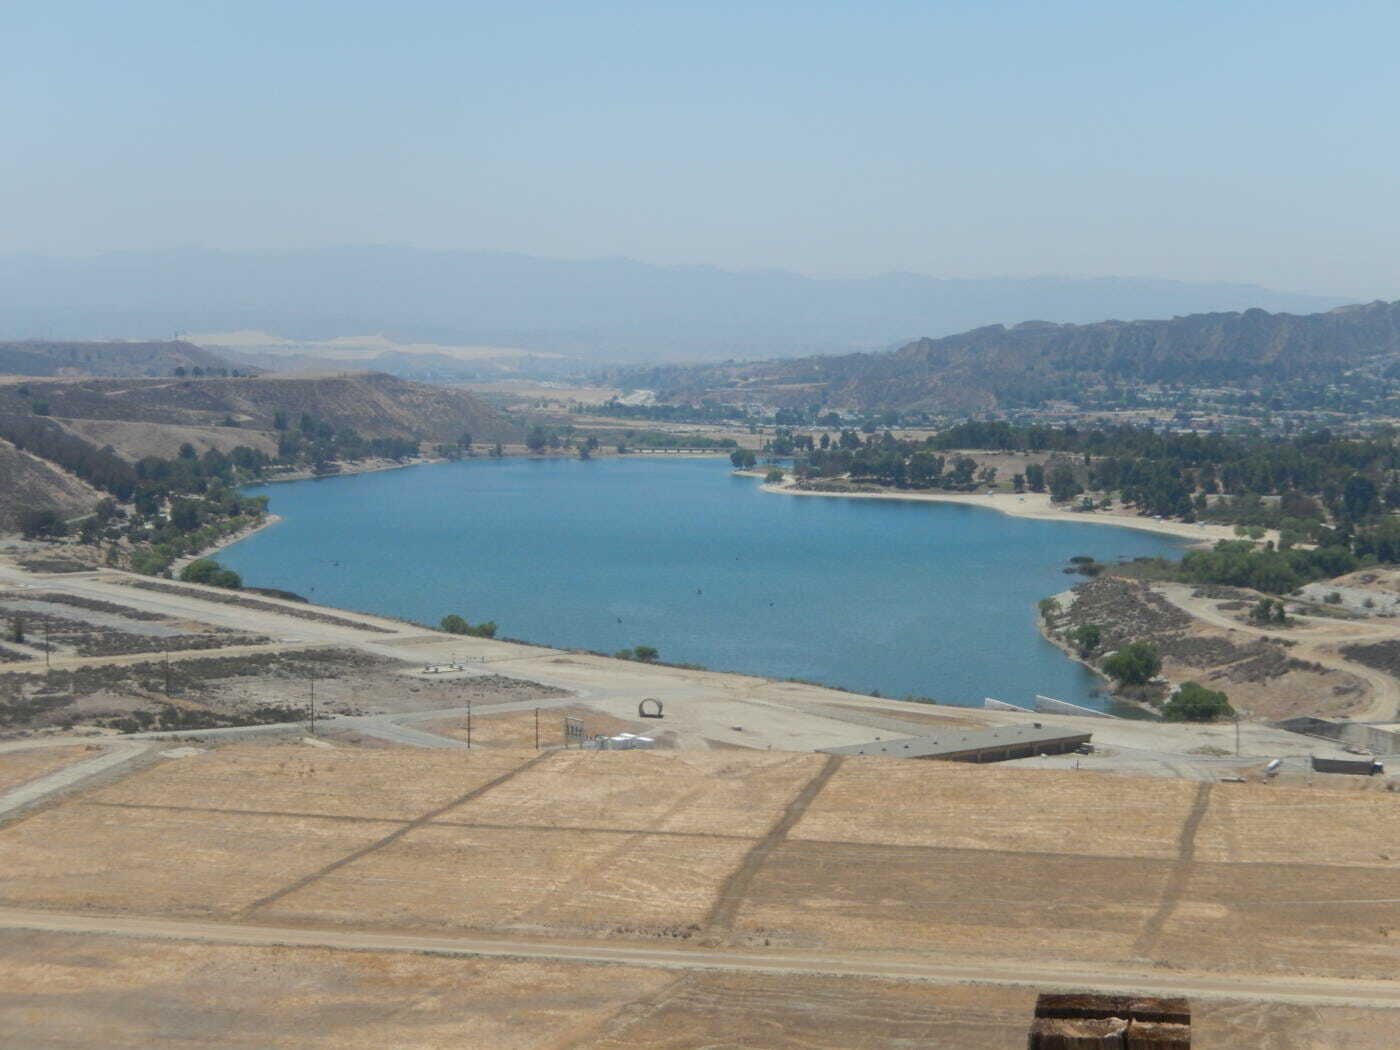
The picture below is of Castaic Lake showing the entrance to the spillway. When the lake water level rises sufficiently, the water enters the spillway area where the water will reach the top of the spillway. Once it reaches the top of the spillway, the water flows down the spillway to the Castaic Lagoon below. Both the main lake and the lagoon are part of the state recreational area open to the public and part of the state water system, so proper management of the lake levels is essential to provide water to the public and provide the recreational opportunities that are demanded by the public.
Spillway entrance area & Castaic Lake
After years of debris collecting in the gallery, it is time to clean it so that it continues to perform its essential function. Periodically, the gallery is cleaned and a private company is hired to perform the work. It is potentially dangerous work because it is in a confined underground space, so anyone who works in the gallery must receive considerable safety training in order to be allowed to enter the gallery.

Upper spillway with cleanup workers set up to work in gallery
The gallery can have hazardous materials, collect explosive gas, can have toxic gas, is completely lightless and can present numerous trip hazards. It is about a 40’ vertical decent to reach the gallery from the entrance hatch which is next to the spillway plus a horizontal walk through the side tunnel to reach the gallery, so one must be capable of climbing down and back up to qualify for working in the gallery in addition to the other training requirements.
Castaic Lake Control House
The customer came to Raycom to rent some portable radios to provide communications from their people located outside the gallery by the three entrance hatches to the people working inside the gallery (which is underground below the spillway). They rented the radios thinking that simplex radios would hopefully give them the required coverage and quickly determined that the range of the radios was not sufficient to communicate to the people inside the gallery. They could reach the person if they were near the entrance hatch in the gallery, but that was short lived since the gallery is almost a mile long, so working near one of the three entrance hatches was only possible for a small portion of the project.
The customer contacted us again to see what could be done to fix the radio coverage issue. I visited the site, but was not allowed into the gallery due to my lack of the official training even though I have been in several similar situations. After looking at the site, it became clear that a repeater was needed to provide the coverage they needed. It also required us to place an antenna inside the gallery where we were not allowed to access. Additionally, there was no place to put the repeater and no way to power the equipment. I spent a couple of hours asking questions, getting answers and making plans so that I could provide a proposal for the project. The proposal was submitted the next day and summarily rejected by the government agency in control of the project due to the politics of us placing equipment at the site considering security, vandalism, power, blocking access etc. However, after the problem continued to get worse as they started working further from the gallery entrance, OSHA requirements for communications within a confined & hazardous workspace forced the agency to change their mind. So we soon received a purchase order from the customer to provide our communications solution & equipment for the project.
Our solution was to take one of our trailers that we use for red carpet shows and other projects and outfit it for solar operation. This would provide is a place to house the equipment without the need for shoreline power. The trailer had to be a completely self contained radio site with everything that was needed for the project as there was no other location where we could place any equipment. Therefore, we would mount the external antenna to the solar panel support system and we had a separate mounting for the microwave dish to bring in the internet access.
We went to work outfitting our trailer for solar operation. We carry solar panels and controllers in stock due to the numerous deployments of solar powered sites for our radio network. We carry batteries in stock because we place backup batteries at every one of our radio sites. We had several digital repeaters in stock, so we chose one for the job and wired it for the job. We carry duplexers, power distribution panels, solar remote monitoring equipment and microwave dishes in stock which provided us with the materials necessary to assemble the system to meet the project requirements.
Equipment in Studio Cabinet
The process started with us building a solar panel mounting system on the trailer to mount the solar panels. We attached strut to the sides of the trailer to hold the mounting pipes which supported the solar mounting rails. This allowed us to mount the solar panels on top of the trailer while providing sufficient structural rigidity to make the structure stable in the wind and reasonable resistant to vandalism. We then installed the solar chargers into the trailer to power the equipment along with a sufficient number of batteries to provide power for prolonged periods of time when the sun was not available to power the system. We utilized 2 panels that are capable of 380W each giving us a maximum power generating capacity of 760 watts. We have 6 batteries with 180 amp-hour capacity which is sufficient battery storage for 1080 amp-hours of energy at 12V. Our total maximum current draw for the repeater and the microwave link (to provide an internet connection for remote monitoring of cameras and solar charging equipment), is about 9 amps which means that we have over 200 hours (8+ days) of operation without any sun at maximum load. In actual operation, the repeater is not transmitting most of the time, so we are able to last considerably longer without any sunlight.

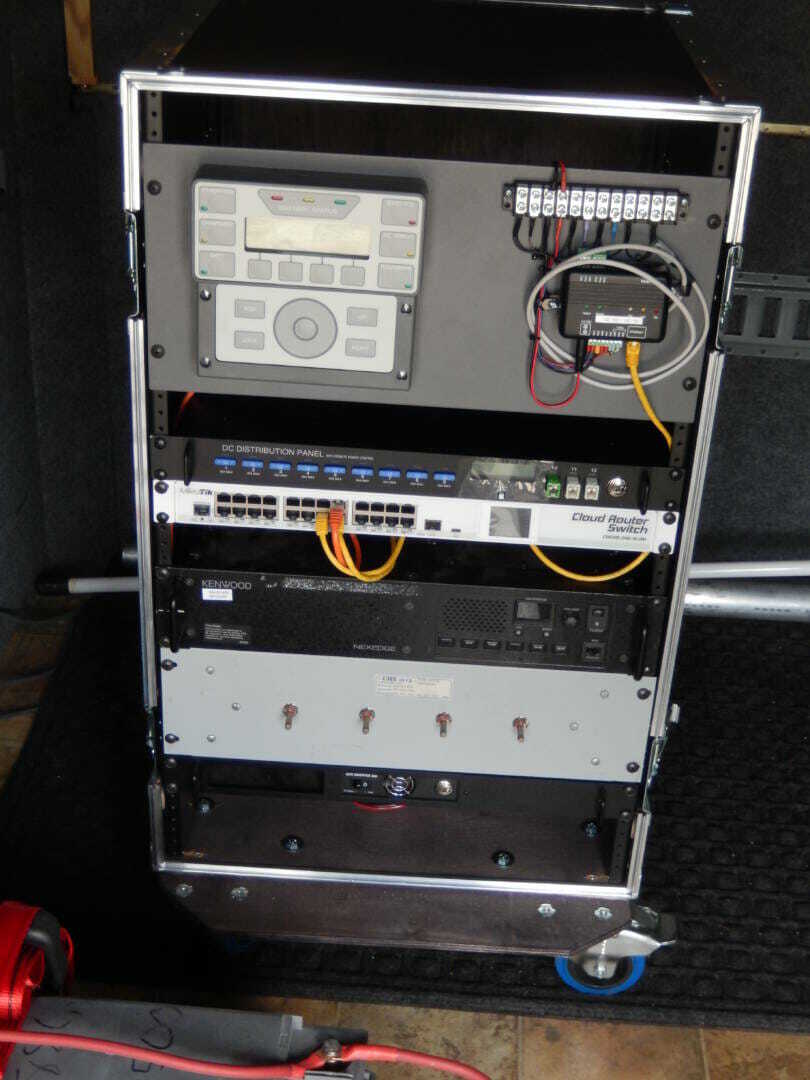
Final Equipment Layout in Trailer
We mounted the repeater with a duplexer in a spare mobile studio cabinet like we use for our studio jobs. We used a power distribution panel that has remote access to power the repeater so that we can remotely reboot the repeater if a problem arises. We installed a MicroTik Cloud Router Switch to access the internet, a sine wave inverter to power any AC equipment that we might need in case of an emergency, a site monitoring system that remotely provided reading of alarms and battery voltage and the solar charge MATE which allows us remote access to the solar charging system to monitor charge voltage, current, battery condition and other functions. There was room for the IP cameras to plug into the router so that they can be viewed remotely from our office or other locations. At this point, we felt that we were completely ready for the installation at the site.
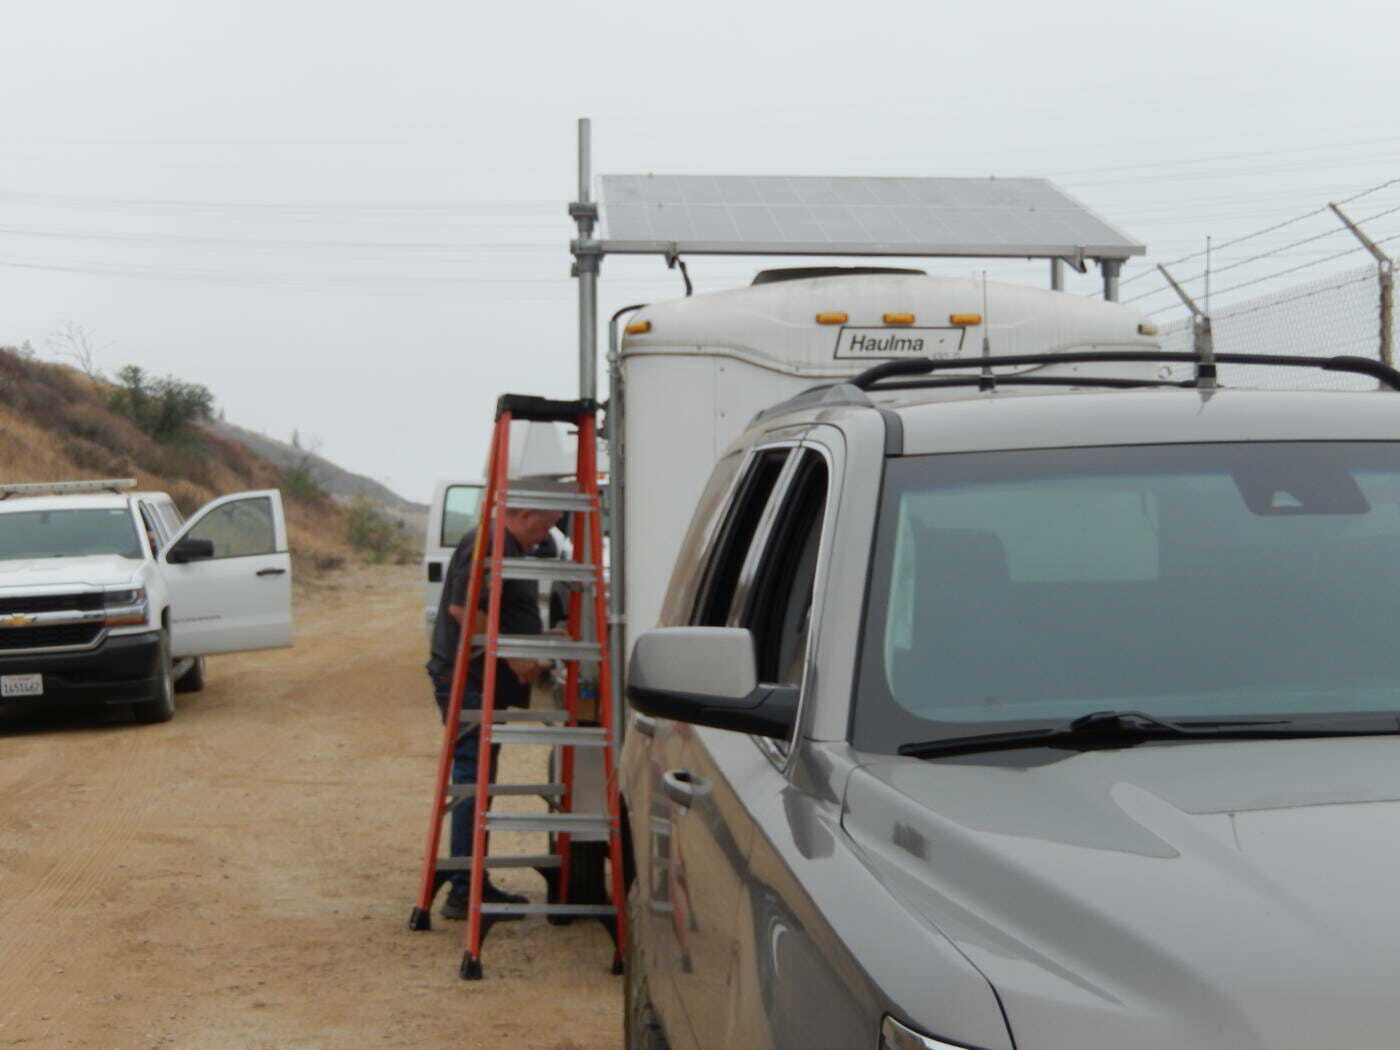
Assembling Soar Panels & Antennas
On Friday morning, we headed out at 6AM to be at the site to meet the customer by 8AM. We arrived a few minutes behind schedule to the customer waiting for us to escort us and the trailer to the site where we were going to set up the trailer. This was going to be at the middle hatch on the west side of the spillway which is accessed through the public parking lot and through a locked gate. We drove up the dirt road towing the trailer and quickly reached the steep section of the road. My vehicle had no trouble pulling the trailer up the road in spite of the steep grade. The road then leveled off to a gentle grade heading north which continued for the balance of the trip. Now that we reached the location where we were to set up, it was time to maneuver the trailer into its approximate position. This required a bit of quick thinking since we needed to turn the trailer around 180 degrees and face south and the road was not wide enough to turn around. Since the road would dead end further up the spillway, there was no other option. We backed the rear of the trailer up to the spillway wall and then unhooked the trailer from the vehicle. After I turned around to head south and moved my vehicle to the south side of the trailer, we moved the trailer tongue far enough so that I could reattach my vehicle to the trailer to finish turning it around and get it into position for setup.
We parked the trailer in a convenient position where we could assemble the solar array, the antennas and all the equipment while still attached to my vehicle. We needed to access all sides of the trailer for this work with step ladders while we mechanically assembled the solar array and the antennas. Another one of the crew was working inside assembling the battery system and connecting the cables of the equipment to the battery system. Eventually, we had all of the wiring completed and ready for the solar panels. We attached the solar panel wires to the cables entering the trailer so that the solar panels would provide the power to the solar controller to charge the batteries.
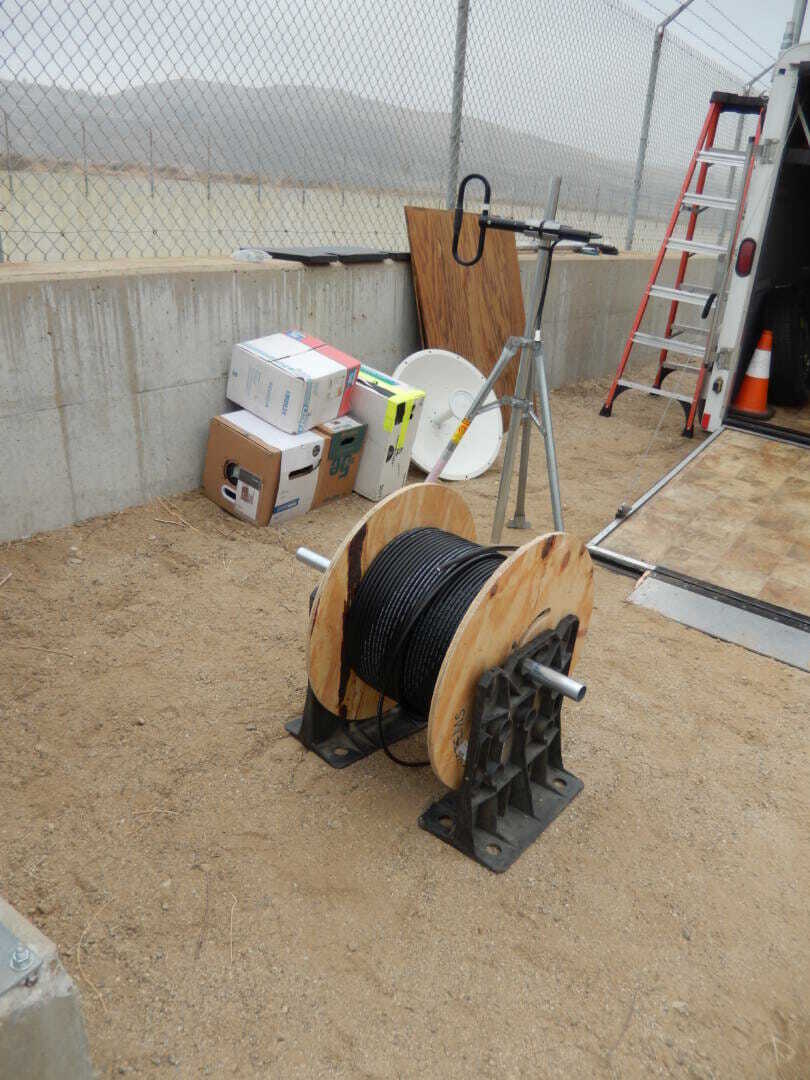
Antenna & Tripod for Gallery With Cable Spool
It was now time to assemble the antenna and have it placed in the gallery by their personnel. The antenna was attached to a mast and mounted to a portable tripod. It was then attached to the antenna cable for lowering into the gallery. We had a cable spool with 1000 feet of LMR400 cable which was needed because we had to place the antenna in the tunnel at the breakpoint where the gallery turns downward to match the slope of the lower portion of the spillway. This way, the antenna could see both the upper portion and lower portion of the gallery at the same time to provide continuous coverage over the entire length of the gallery. They had to take the antenna approximately 800 feet south after descending the 40’ to the gallery level and another 50 feet to reach the gallery from the side tunnel. This used most of the cable from the 1000’ spool of cable.

Trailer Moved Into Position
It was time to park the trailer in its “permanent” location for the duration of the project. We moved all the material out of the way and proceeded to back the trailer up to the hatch enclosure while maintaining minimal distance from the wall of the spillway. Once we finished that process, we were able to mount the two-way radio antenna above the dish and we were able to make the RF connections to get the repeater on the air. We attached the antenna cable to the antenna that was to be mounted on top of the trailer and connected the other end to the signal splitter. The splitter was attached to the output of the duplexer. The splitter we selected fed 2/3 of the signal to the gallery and 1/3 of the signal to the antenna on the trailer.

Mobile Solar Powered Repeater Trailer
This way, there would be signal both above ground and below ground so that everyone could talk to each other regardless of where they were located. The third port on the signal splitter had to be attached to the cable that went to the antenna in the gallery. Since the metal hatch that closes off the gallery from unwanted visitors would be closed every afternoon after work is finished and there was no space for the cable once the hatch was closed, we had to rig up a quick disconnect at the hatch so that the hatch could be closed at the end of each work day. We installed the connectors for the quick disconnect, but to make the connectors on the ends of the cables reliable, we felt that we needed to use Heatshrink tubing to secure and waterproof the connection which was outdoors. This required a “hot work permit” to shrink the Heatshrink tubing which entailed about 1 hour of work to get the paperwork, fill it out completely, another 15 minutes of training of our personnel on the requirements for using the torch to prevent any chance of starting a fire before we were allowed to spend 2 minutes shrinking the
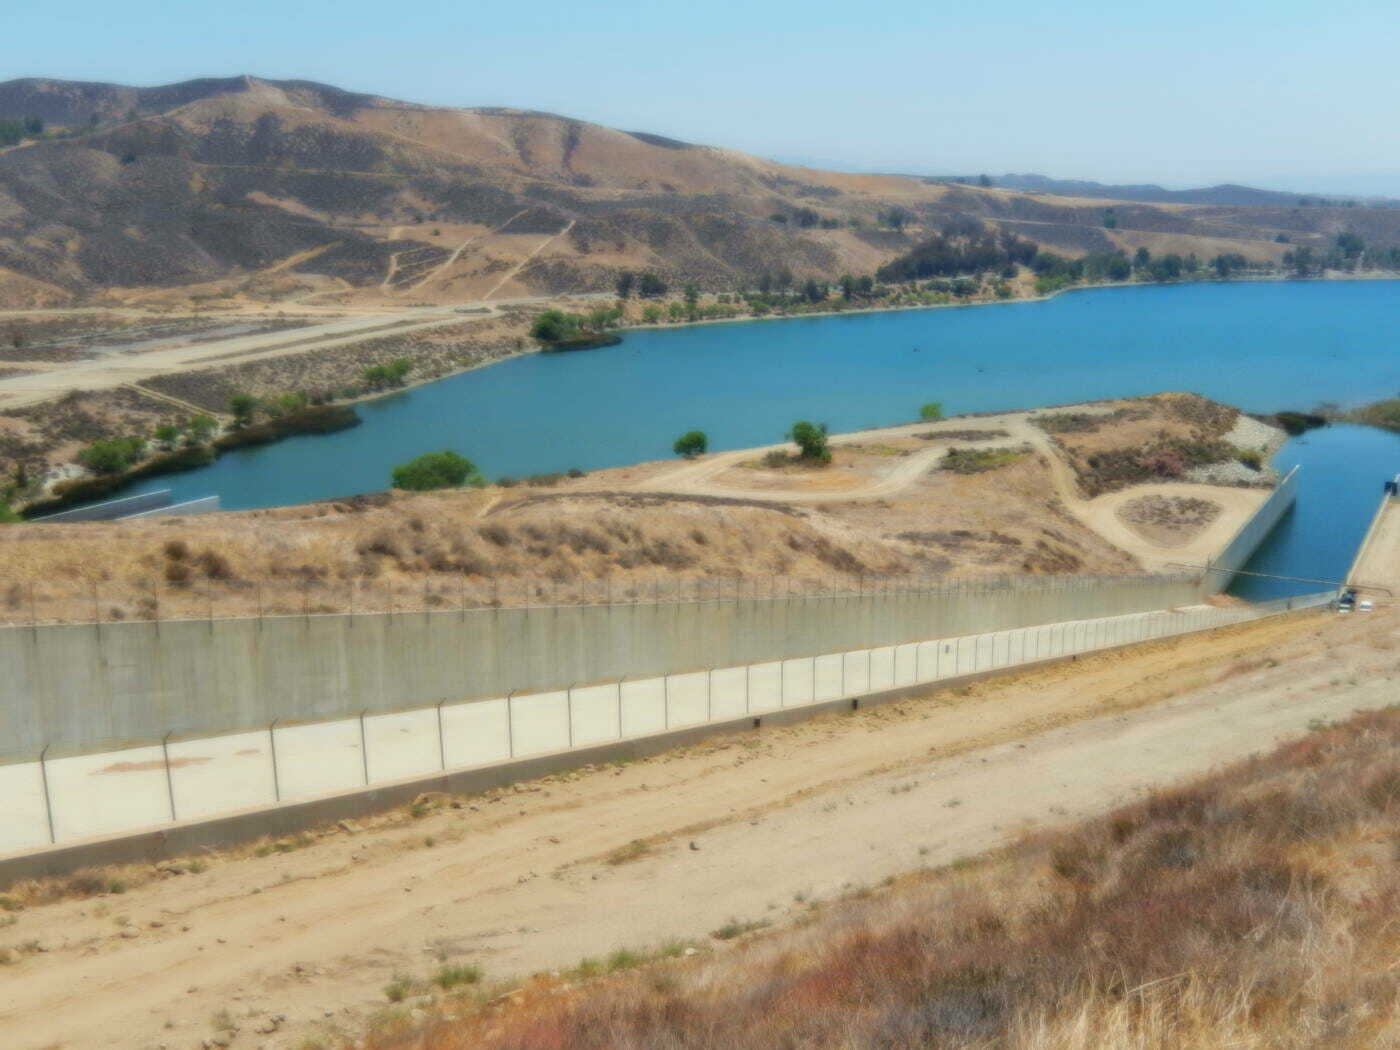
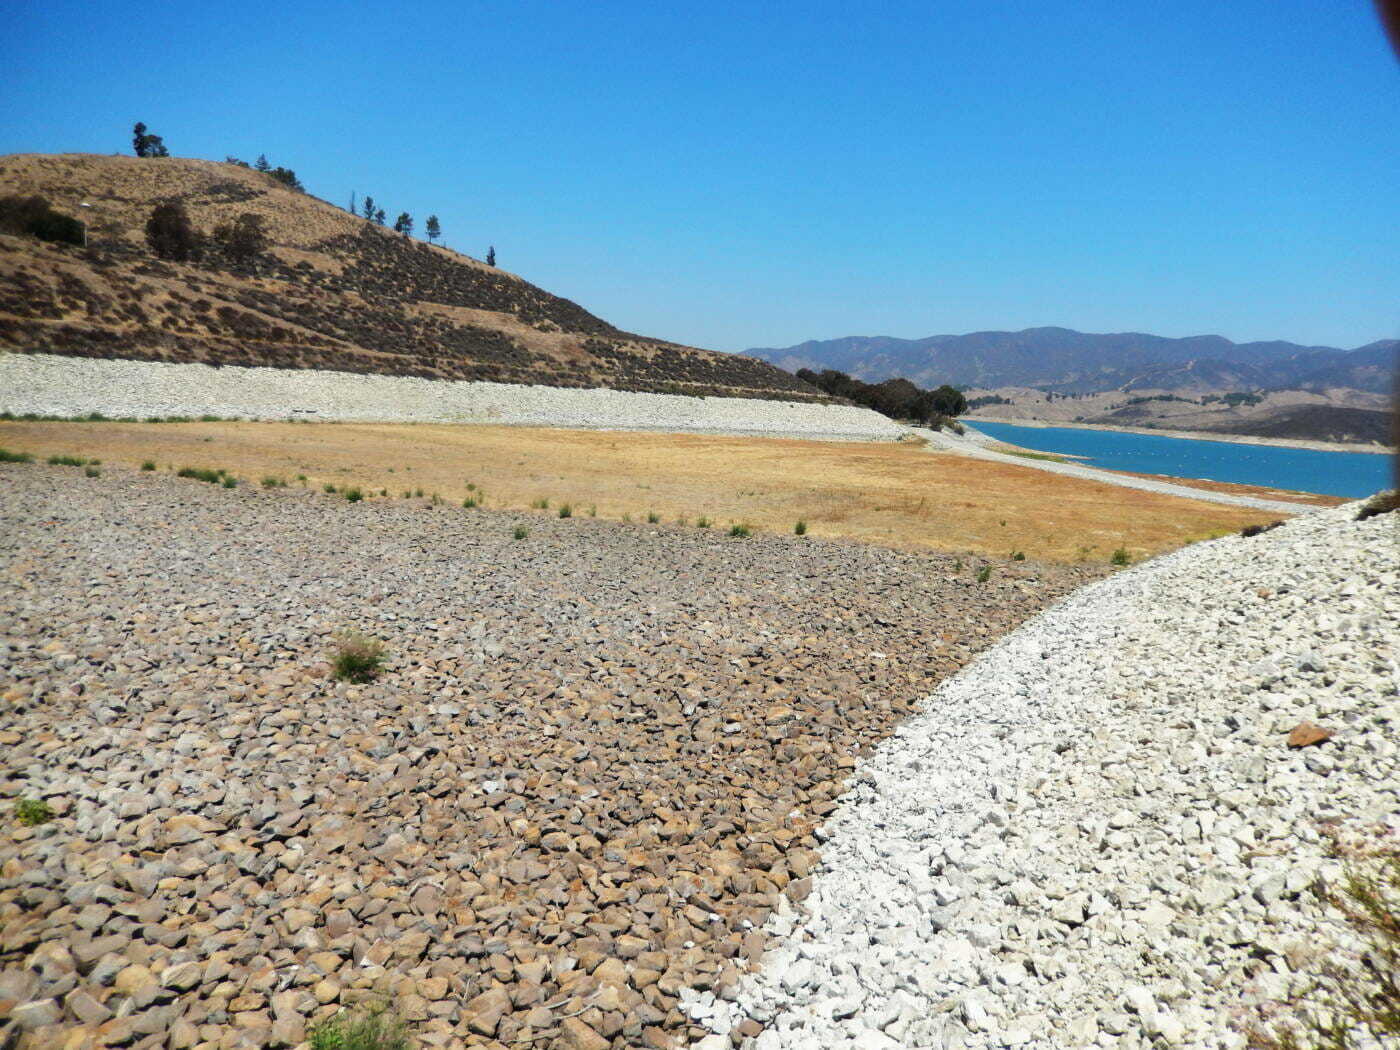
Lower Portion of Spillway, Steep Road & Castaic Lagoon
Heatshrink tubing around the connectors. (Fortunately we anticipated the possibility of needing the hot work permit 2-3 hours before we needed it. We have been trained on this type of work many times in the past and have been doing this work for almost 50 years without a single incident, but that was of no consideration.) We then connected the quick disconnect and checked the entire antenna system match to verify system integrity.

Castaic Lake, Upper Lake From The DAM
While the antenna work was being finished, I left with one of them to go to the upper hatch where the people were going to exit the gallery and break for lunch. This gave me the opportunity to reprogram the radios so that they would work correctly with the repeater. To reach the upper hatch was no easy task because it was on the east side of the spillway and we were on the west side. Therefore, we had to head down the spillway to the parking area where we originally met them, exit the parking area, drive south to Lake Hughes Road, head north on Lake Hughes Road to the entrance of the main lake, drive to the lower parking area, drive across the dam road to the west side of the dam where the spillway was located and drive down to the hatch area. This took about 14 minutes to get there at which time I proceeded to reprogram their other radios so that all of the radios would work properly on the repeater system. After reprogramming all the radios, I packed up my equipment and returned to the site of the trailer installation which took another 14 minutes. Since the repeater system was fully operational, I was able to test coverage around the lake and spillway to confirm that we had 100% coverage of the project area so that they would have reliable communications both outside and inside the gallery.
View of Castaic Lagoon, Lower Lake From the DAM
Upon my return to the trailer, the guys were aligning the microwave dish to get the internet signal which was coming from Oat Mtn. The path was about 11 miles long, so we were able to make the shot with a 2’ dish on a 5.8GHz frequency. We were able to obtain a -50dbm signal which is a good quality signal and allows for a reasonably fast internet connection. Then it was time to set up the cameras which proceeded without a hitch. The security cameras are fully functional and plugged into the router to facilitate remote viewing of the cameras.
Our repeater was programmed to utilize one of our exclusive frequencies that we purchased at FCC auction so we did not need to license anything to get this system on the air. Our FCC Part 22 licenses are exclusive to MRA and we own the frequencies from the northern Kern County line to the Mexican border and from the Pacific Ocean to the Nevada-Arizona border. We can operate anywhere on those channels within our geography without any prior notice or authorization from the FCC which gives us the flexibility to set up radio systems on short notice. The microwave system was on 5.8GHz which is an unlicensed frequency, so we were able to do this entire project without any need to file for an FCC license.
The entire project was done on short notice. We received a purchase order on Monday, May 10, 2021 and we had the system up and running on the air by Friday, May 14, 2021. Few (if any) other radio shops could have performed this quickly or done the job at all. Raycom was able to successfully complete the entire solar powered project within 4 days of receiving the order to proceed with the project.

